")
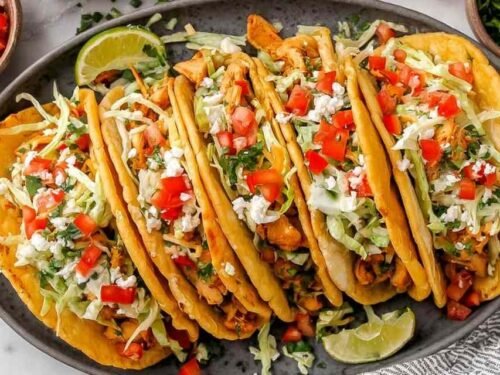
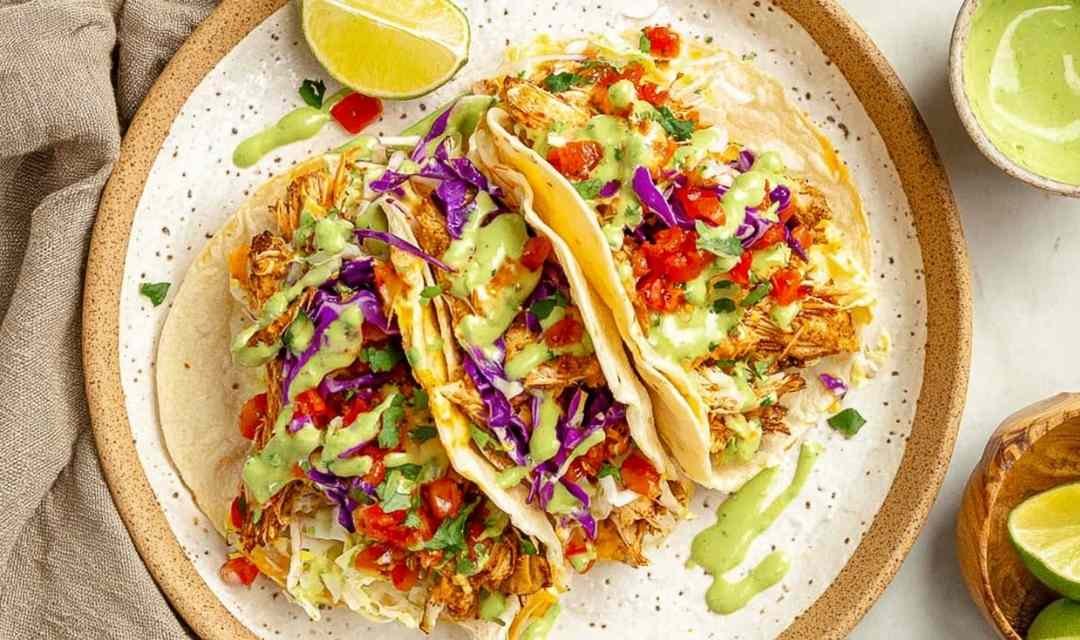
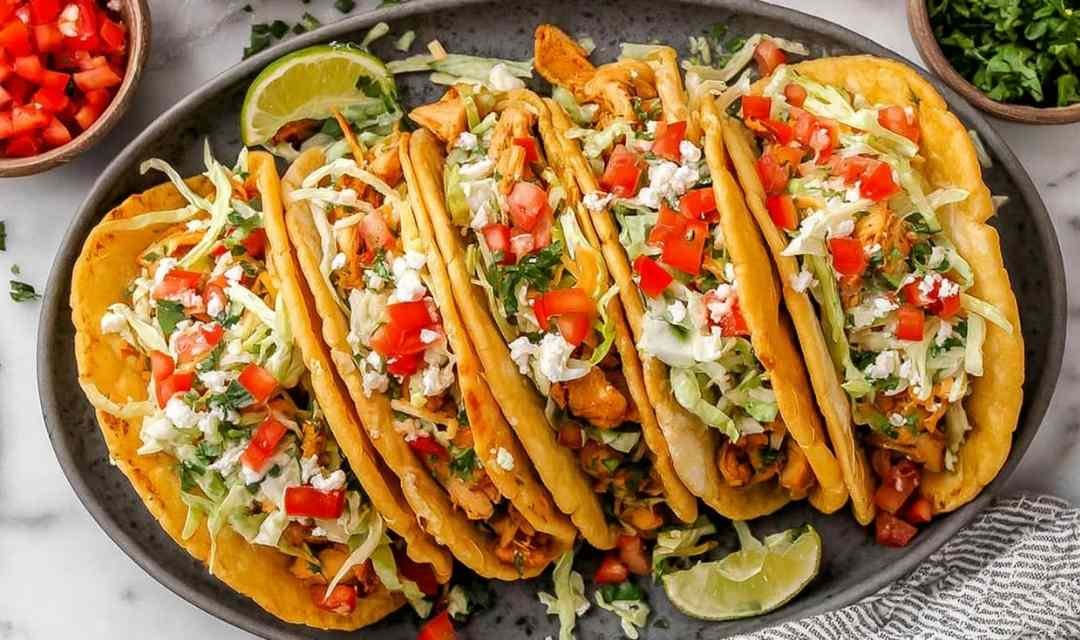
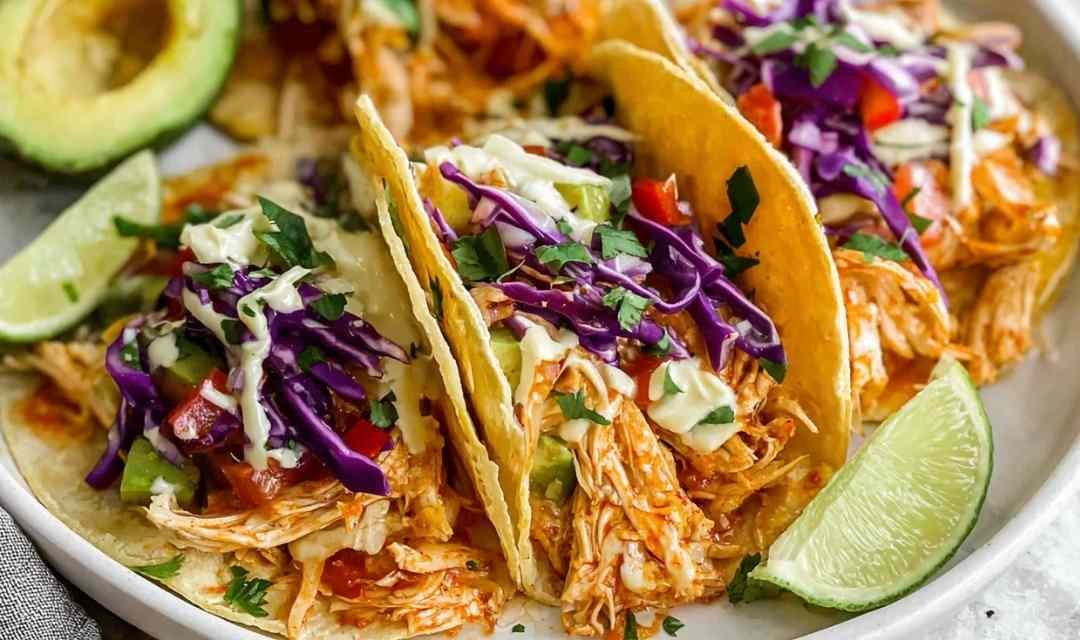
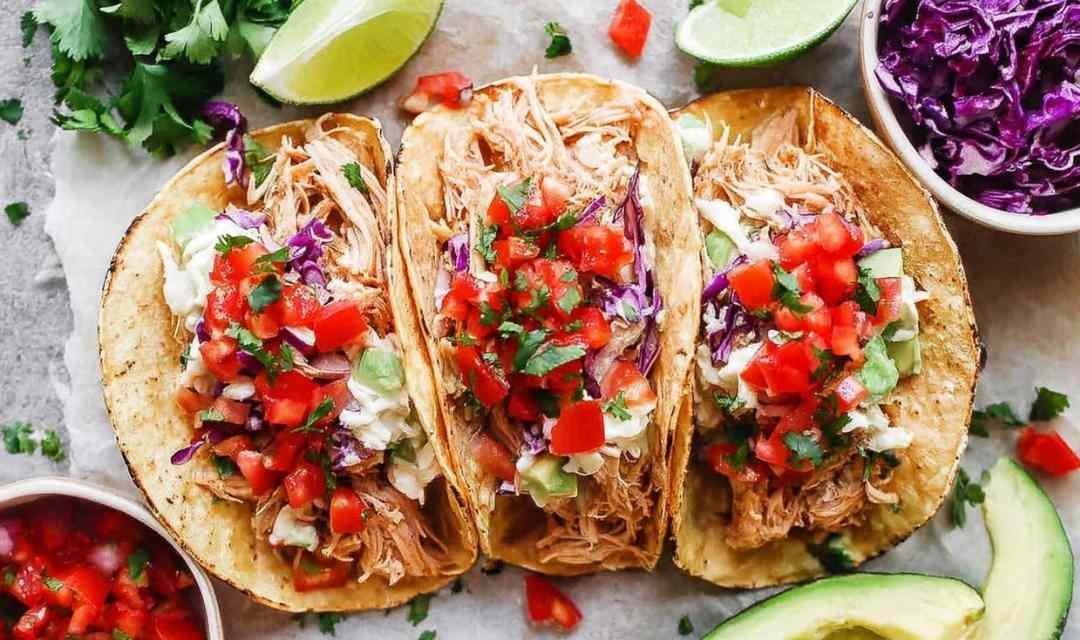
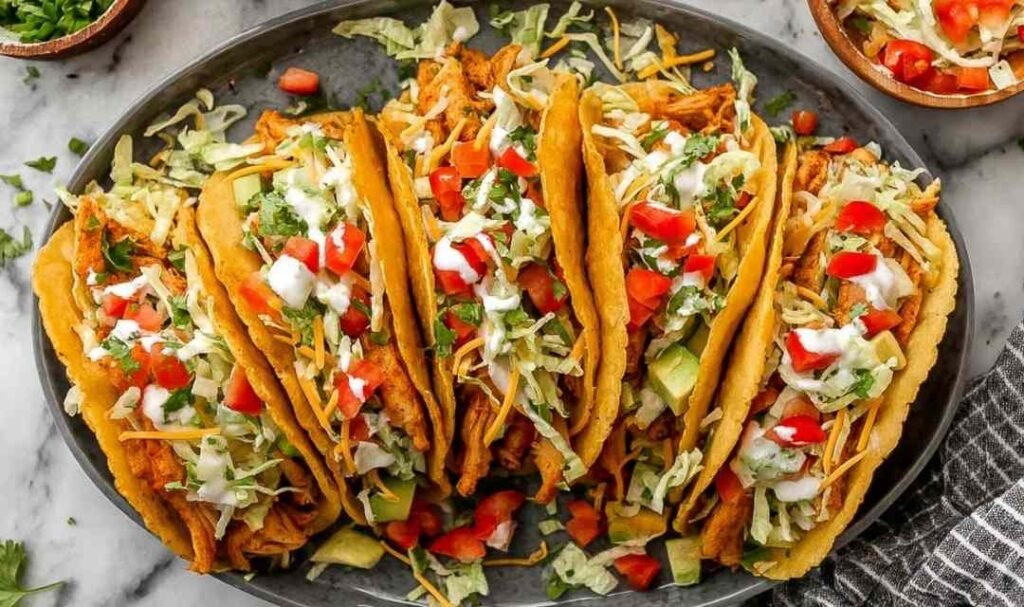
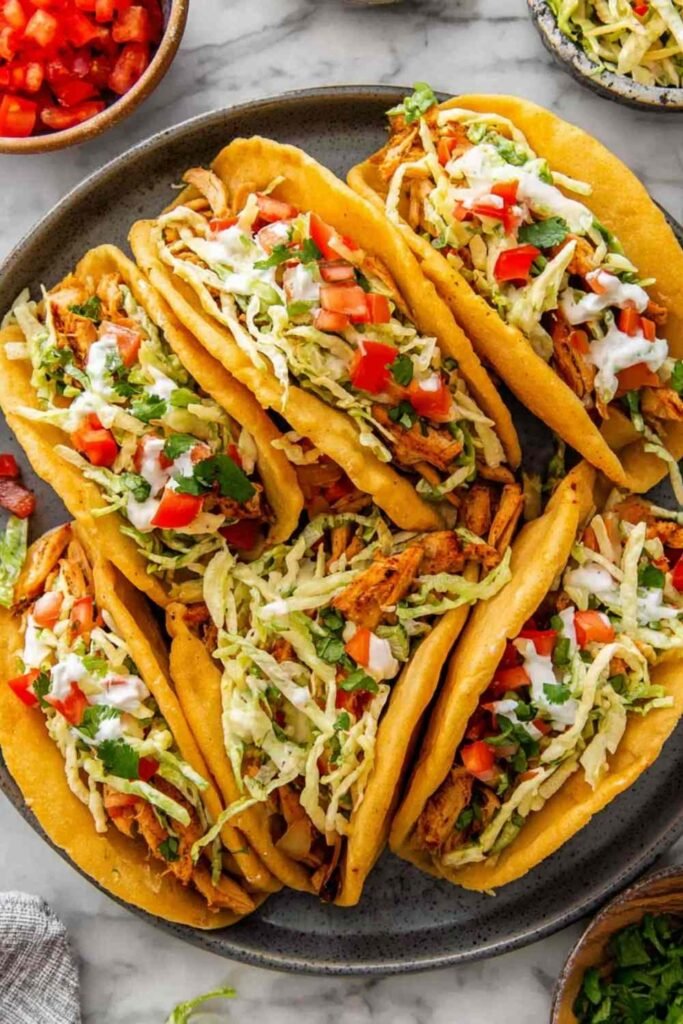
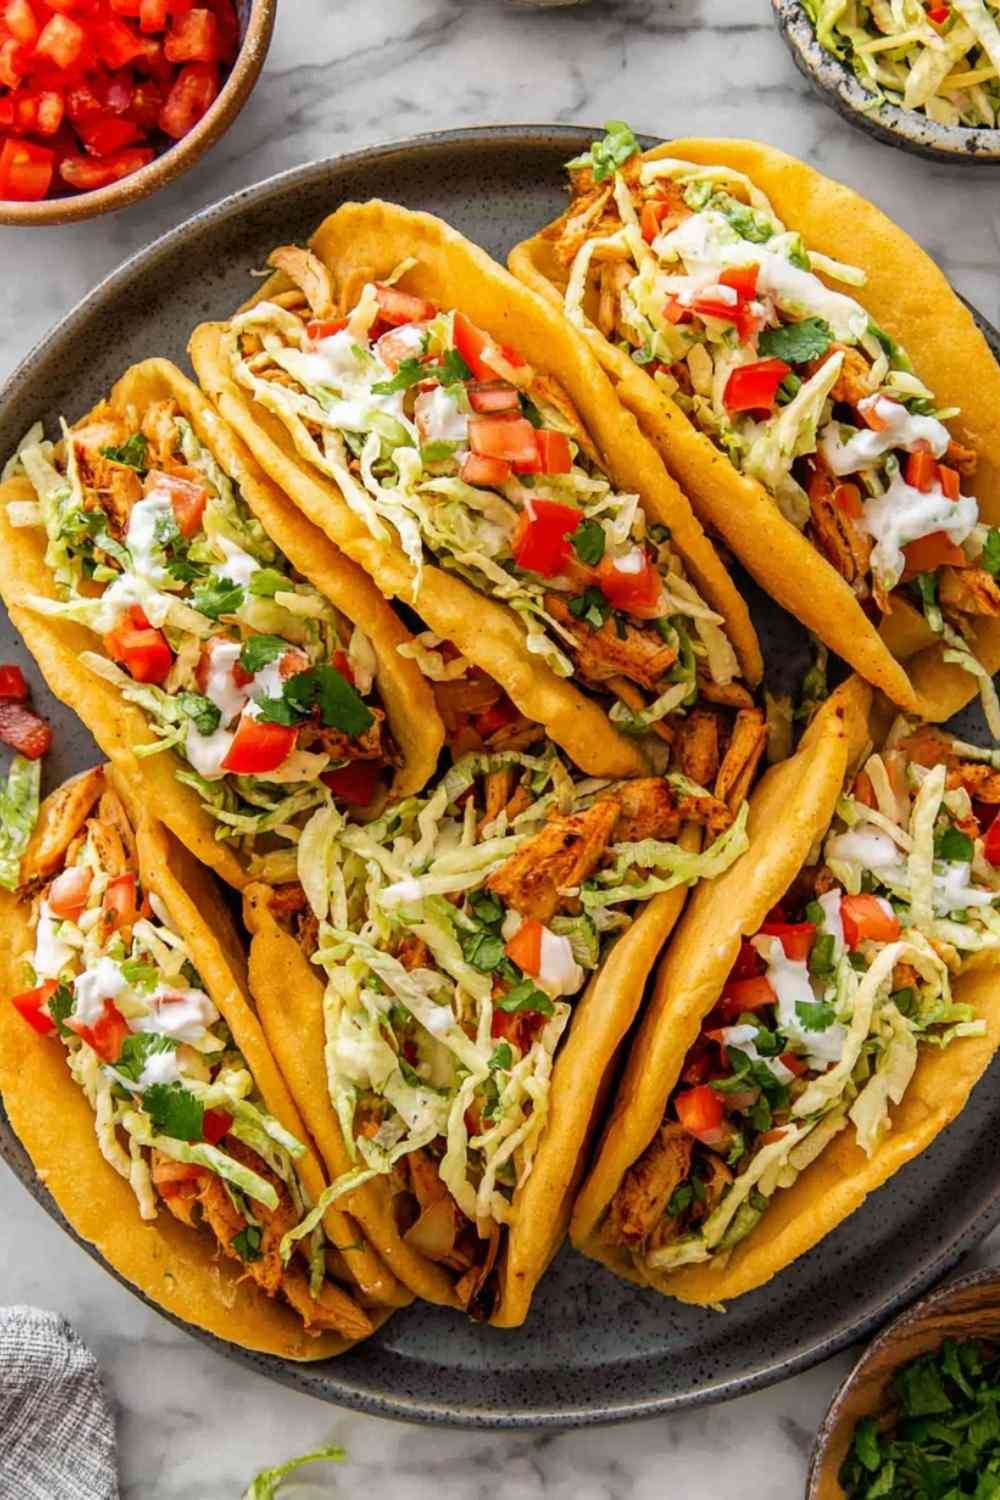
Chicken chalupas are crispy, puffy fried tortilla shells loaded with juicy seasoned chicken, melted cheese, and fresh toppings. I make these on busy weeknights when the family wants something fun and satisfying without a long wait. Honestly, these taste better than anything from the drive-thru, and they are ready in just 20 minutes.
I still remember the first time I made chicken chalupas at home. I was standing in my kitchen craving that crispy Taco Bell shell, and I thought, why not just make it myself? What I got was way better. The shells puffed up golden and light, the chicken was perfectly seasoned, and every single person at the table came back for more. Now this is one of those recipes I keep coming back to, week after week.
These chicken chalupas bring bold Mexican-inspired flavor to your dinner table without any stress. The shells fry up in minutes, the filling comes together fast, and you can top them however you like.
Table of Contents
Ingredients for Chicken Chalupa Recipe
I always keep these simple pantry staples stocked because once you try homemade chicken chalupas, you will want to make them on repeat. The ingredient list is short, but every piece plays a role in building that bold, satisfying flavor.
- 1 pound boneless, skinless chicken breasts (sliced into bite-sized pieces)
- 1 tablespoon taco seasoning — I recommend using a quality store-bought blend or your own homemade mix for the best flavor
- 1/2 teaspoon onion powder
- 1/2 teaspoon garlic powder
- 1/4 teaspoon kosher salt
- 1 tablespoon olive oil (for cooking the chicken)
- 1 cup neutral oil such as canola or vegetable oil (for frying the shells) — Pro tip: always use a high smoke point oil for frying to avoid any bitter taste
- 8 flour chalupa tortillas — In my experience, Mission Brand chalupa shells give you the best puff and crispiness; regular flour tortillas will work in a pinch but won’t be as fluffy
- 1 cup shredded cheese — My preference is a Mexican blend for that melty, creamy finish
Optional Toppings:
- Shredded lettuce
- Diced tomatoes
- Sour cream
- Salsa
Step-by-Step Instructions
I recommend reading through all the steps before you start so you can have everything ready at the right moment. Chicken chalupas come together quickly, and a little prep goes a long way.
Step 1: Slice the chicken breasts into bite-sized pieces and pat them dry with a paper towel. Rub the taco seasoning, onion powder, garlic powder, and kosher salt evenly over all the pieces to coat them well.
Step 2: Heat 1 tablespoon of olive oil in a large skillet over medium heat. Once the oil is shimmering, add the seasoned chicken pieces in a single layer. Cook for 4 to 5 minutes, turning once, until the chicken is golden brown on the outside and cooked all the way through. Set aside.
Step 3: In a separate large, deep skillet, heat 1 cup of oil over medium heat. Test the oil temperature by dipping the edge of a chalupa tortilla into the oil. If it bubbles right away, the oil is ready. Do not skip this test or your shells may turn out greasy instead of crispy.
Step 4: Using heat-resistant tongs, dip one half of a chalupa tortilla into the hot oil while folding the other half over it to form a taco shell shape. Hold it in place for about 30 seconds until that half is golden and puffed, then flip carefully and fry the other side the same way. Repeat with all 8 tortillas.
Step 5: Fill each crispy chalupa shell right away with the cooked chicken and shredded cheese. Add your toppings of choice such as shredded lettuce, diced tomatoes, sour cream, and salsa. Serve immediately for the best crunch.
What to Serve with Chicken Chalupas
These chalupas are bold and filling on their own, but the right sides can turn this into a full spread everyone will love. Here are my top picks for rounding out the meal with great flavor and texture contrast.
Mexican Chicken Marinade: If you are planning ahead, marinated chicken makes a fantastic filling variation. The smoky citrus flavors complement the fried shell beautifully.
Street Corn Chicken Bowl: Serve this on the side for a creamy, charred corn element that pairs perfectly with the bold taco seasoning in the chalupas.
Easy Chicken Salad: A light, cool chicken salad on the side balances the richness of the fried shells and adds a refreshing contrast to the meal.
Chicken Avocado Ranch Burritos: For a Mexican night spread, set these alongside your chalupas and let everyone build their own plate.
Honey BBQ Chicken Rice Bowl: A scoop of seasoned rice on the side soaks up any extra salsa or sour cream and makes the meal more filling for bigger appetites.
BLT Chicken Salad: Crispy bacon and fresh greens make this side salad a great partner to the warm, crunchy chalupas.
Storage and Serving Tips
Store the cooked chicken filling in an airtight container in the refrigerator for up to 3 days, or freeze it for up to 3 months. I always keep the chalupa shells and the filling separate to avoid sogginess.
To reheat, warm the chalupa shells in a 350 degree F oven for 6 to 7 minutes until they crisp back up. Reheat the chicken in the microwave until warmed through, then assemble fresh. Pro tip: never assemble the chalupas ahead of time or the shells will go soft.
These chicken chalupas are also great for a taco bar setup. Set out the shells, chicken, cheese, and all the toppings and let everyone build their own. It is a fun and easy way to feed a crowd with very little effort.
FAQs
Can I use rotisserie chicken instead of cooking chicken breasts?
Yes, absolutely. Season shredded rotisserie chicken with taco seasoning and it works perfectly as the filling with zero extra cooking time.
What if I cannot find chalupa tortillas at my store?
Regular flour tortillas will work, but they will not puff up the same way. Look for Mission Brand chalupa shells in the tortilla aisle for the best results.
Can I bake the shells instead of frying them?
Frying is what gives chalupa shells their signature puff and crunch. Baking will not produce the same result, so frying is strongly recommended for an authentic texture.
Conclusion
These homemade chicken chalupas are the kind of recipe that makes a regular Tuesday night feel like something special. They are quick, easy, and so much better than anything from a drive-thru. Give them a try tonight and watch everyone at the table light up. Once you make them at home, there is no going back.
Homemade Chicken Chalupas
Ingredients
Equipment
Method
- Slice the chicken breasts into bite-sized pieces and pat them dry. Rub the taco seasoning, onion powder, garlic powder, and kosher salt evenly over all the pieces.
- Heat 1 tablespoon of olive oil in a large skillet over medium heat. Add the seasoned chicken in a single layer and cook for 4 to 5 minutes, turning once, until golden brown and cooked through. Set aside.
- In a separate large deep skillet, heat 1 cup of oil over medium heat. Test by dipping the edge of a chalupa tortilla into the oil. If it bubbles immediately, the oil is ready.
- Using heat-resistant tongs, dip one half of a chalupa tortilla into the hot oil while folding the other half over it to form a taco shell shape. Hold for about 30 seconds until golden and puffed, then flip and fry the other side. Repeat with all 8 tortillas.
- Fill each crispy chalupa shell with cooked chicken and shredded cheese. Add toppings such as shredded lettuce, diced tomatoes, sour cream, and salsa. Serve immediately.